一、playbook剧本的优势
 1.减少重复的书写的指令: ansible backup -m file -a
 2.看起来简洁清晰
 3.功能强⼤,可以控制流程
 4.其他剧本可以复⽤
 5.提供检查语法和模拟执⾏
⼆、剧本的格式书写要求
1.YAML格式特点
1.严格的缩进表示层级关系
2.⼀定不要使⽤tab
3.: 后⾯必须有空格
4.- 后⾯必须有空格
5.yaml格式的⽂件后缀名需要改成yaml或者yml
2.剧本的组成
hosts: 需要执⾏的主机
tasks: 需要执⾏的任务
name: 任务的名称
三、编写Rsync剧本(示例)
1.命令行模式的编写
#1.创建www组和www⽤户
ansible backup -m group -a "name=www gid=666"
ansible backup -m user -a "name=www uid=666 group=www create_home=no
shell=/sbin/nologin"
#2.创建数据⽬录
#3.更改数据⽬录授权
ansible backup -m file -a "path=/data state=directory owner=www group=www"
#4.安装rsync软件
ansible backup -m yum -a "name=rsync state=latest"
#5.⽣成配置⽂件
ansible backup -m copy -a 'src=/opt/rsyncd.conf dest=/etc/'
#6.创建密码⽂件
#7.修改密码⽂件权限为600
ansible backup -m copy -a 'src=/opt/rsync.passwd dest=/etc/rsync.passwd
mode=600'
#8.启动rsyncd服务
ansible backup -m service -a "name=rsyncd state=started enabled=yes"
2.改写成剧本
[root@m01 /server/scripts]# cat rsync_install.yml
- hosts: backup
  tasks:
  - name: add_group
    group:
      name: www
      gid: 666

  - name: add_user
    user:
      name: www
      uid: 666
      group: www
      create_home: no
      shell: /sbin/nologin

  - name: mkdir_data
    file:
      path: /data
      state: directory
      owner: www
      group: www

  - name: install_rsync
    yum:
      name: rsync
      state: latest

  - name: copy_config
    copy:
      src: /opt/rsyncd.conf
      dest: /etc/

  - name: copy_passwd
    copy:
      src: /opt/rsync.passwd
      dest: /etc/rsync.passwd
      mode: 600

  - name: start_rsyncd
    service:
      name: rsyncd
      state: started
      enabled: yes
3.模拟执行
ansible-playbook -C rsync_install.yam
4.执行
ansible-playbook rsync_install.yaml
四、编写NFS剧本
1.命令行模式的编写
NFS服务端:
[root@m-61 /scripts]# cat nfs_server_install.yaml
- hosts: nfs_server
  tasks:
  - name: 01-add group
    group: name=www gid='666'
  - name: 02-add user
    user: name=www create_home=no shell=/sbin/nologin group=www uid=666
  - name: 03-install nfs service
    yum: name=nfs-utils state=latest
  - name: 04-copy nfs exports
    copy: src=/server/scripts/exports dest=/etc/
  - name: 05-create data dir
    file: path=/data state=directory owner=www group=www
  - name: 06-start rpcbind
    service: name=rpcbind state=started
  - name: 07-start nfs
    service: name=nfs state=started
  - name: 08-enable rpcbind
    systemd: name=rpcbind enabled=yes
  - name: 09-enable nfs
    systemd: name=nfs enabled=yes
NFS客户端:
[root@m-61 /scripts]# cat nfs_client_install.yaml
- hosts: nfs_client
  tasks:
  - name: 01-add group
    group: name=www gid=666
  - name: 02-add user
    user: name=www create_home=no shell=/sbin/nologin group=www uid=666
  - name: 03-install nfs service
    yum: name=nfs-utils state=latest
  - name: 04-create data dir
    file: path=/data state=directory owner=www group=www
  - name: 05-start rpcbind
    service: name=rpcbind state=started
  - name: 06-enable rpcbind
    systemd: name=rpcbind enabled=yes
  - name: 07-mount data
    mount: path=/data src=172.16.1.31:/data fstype=nfs opts=defaults state=mounted
五、剧本⾼级特性-循环
0.官⽅⽂档
https://docs.ansible.com/ansible/latest/user_guide/playbooks_loops.html?
highlight=loop
1.应⽤场景
安装多个软件
创建多个⽬录
复制多个⽂件
复制多个⽂件到不同的⽬录
不同的⽂件权限不⼀样
2.循环书写⻛格1:单行模式
- name: create_data
    file: path=/data state=directory owner=www group=www
- name: create_backup
    file: path=/backup state=directory owner=www group=www
3.循环书写⻛格2:缩进模式
需求: 创建2个⽬录/data和/backup
以前的写法:
  - name: create_data
    file:
      path: /data
      state: directory
      owner: www
      group: www
  - name: create_data
    file:
      path: /backup
      state: directory
      owner: www
      group: www
循环实现:
  - name:  create_data
    file:
      path: "{{ item }}"
      state: directory
      owner: www
      group: www
    loop:
      - /data
      - /backup
4.循环书写⻛格3: 混合⻛格
- name: create_data
  file: path="{{ item }}" state=directory owner=www group=www
  loop:
    - /data
    - /backup
5.循环书写⻛格3: 多参数循环模式
- hosts: backup
  tasks:
  - name: create_data
    file:
      path: "{{ item.path }}"
      state: directory
      owner: www
      group: www
      mode: "{{ item.mode }}"
    loop:
      - { path: '/data' , mode: '755' }
      - { path: '/backup', mode: '777' }
六、剧本⾼级特性-变量
1.应⽤场景
1.⾃定义某个名称,在任务中会多次引⽤
2.从主机收集的系统信息中提取某个变量并引⽤,例如⽹卡信息
2.⾃定义⼀个变量并引⽤
- hosts: backup
  vars:
    data_path: /opt/
    dest_path: /etc/
    file_path: /opt/rsync.passwd

  tasks:
  - name: 01mkdir
    file:
      path: "{{ data_path }}"
      state: directory

  - name: 02copy
    copy:
      src: "{{ file_path }}"
      dest: "{{ dest_path }}"
3.使⽤变量获取主机的eth1地址和主机名
- hosts: all
  tasks:
  - name: 01get IP
    shell: "echo {{ ansible_default_ipv4.address }} >> /tmp/ip.txt"
  - name: 02get hostname
    shell: "echo {{ ansible_hostname }} >> /tmp/hostname.txt"
4.在主机清单⽂件⾥定义变量
主机清单
[root@m01 ~/ansible_script]# cat /etc/ansible/hosts
[web]
10.0.0.7 port=8888
10.0.0.8 port=9999
[web:vars]
nginx_version='1.19'
引用变量
[root@m-61 /script/playbook]# cat web_vars.yaml
- hosts: web
  tasks:
  - name: 01get port
    shell: "echo {{ port }} >> /tmp/port.txt"
  - name: 02get version
    shell: "echo {{ nginx_version }} >> /tmp/version.txt"
5.循环里引用变量
- name: test for
  hosts: backup
  vars:
    rsyncd_conf: /script/rsyncd.conf
    rsyncd_pass: /script/rsync.passwd
  tasks:
  - name: 01-copy
    copy:
      src: "{{ item.src }}"
      dest: /etc/
      mode: "{{ item.mode }}"
    loop:
      - { src: "{{ rsyncd_conf }}", mode: '0644'}
      - { src: "{{ rsyncd_pass }}", mode: '0600'}
6.ansible内置变量
其他ansible内置变量
ansible_facts.eth0.ipv4.address
ansible_facts.eth1.ipv4.address
ansible_nodename 节点名字
ansible_form_factor 服务器类型
ansible_virtualization_role 虚拟机角色(宿主机或者虚拟机)
ansible_virtualization_type 虚拟机类型(kvm)
ansible_system_vendor 供应商(Dell)
ansible_product_name 产品型号(PowerEdge R530)
ansible_product_serial 序列号(sn)
ansible_machine 计算机架构(x86_64)
ansible_bios_version BIOS版本
ansible_system 操作系统类型(linux)
ansible_os_family 操作系统家族(RedHat)
ansible_distribution 操作系统发行版(CentOS)
ansible_distribution_major_version 操作系统发行版主版本号(7)
ansible_distribution_release 操作系统发行版代号(core)
ansible_distribution_version 操作系统发行版本号(7.3.1611)
ansible_architecture 体系(x86_64)
ansible_kernel 操作系统内核版本号
ansible_userspace_architecture 用户模式体系(x86_64)
ansible_userspace_bits 用户模式位数
ansible_pkg_mgr 软件包管理器
ansible_selinux.status selinux状态
#--------------------------------------------
ansible_processor CPU产品名称
ansible_processor_count CPU数量
ansible_processor_cores 单颗CPU核心数量
ansible_processor_threads_per_core 每个核心线程数量
ansible_processor_vcpus CPU核心总数
ansible_memtotal_mb 内存空间
ansible_swaptotal_mb 交换空间
ansible_fqdn 主机的域名
ansible_default_ipv4.interface 默认网卡
ansible_default_ipv4.address 默认IP地址
ansible_default_ipv4.gateway 默认网关
********* json 格式 ********
ansible_devices 硬盘设备名
ansible_devices.vendor 硬盘供应商
ansible_devices.model 硬盘整列卡型号
ansible_devices.host 硬盘整列卡控制器
ansible_devices.size 设备存储空间
********* json 格式 ********
ansible_interfaces 网卡
ansible_{interfaces}.ipv4.address 网卡IP地址
ansible_{interfaces}.ipv6.0.address 网卡IPv6地址
ansible_{interfaces}.macaddress 网卡mac地址
七、剧本⾼级特性-注册变量
1.应⽤场景
调试,将结果回现出来
将结果保存成变量供其他流程引⽤
2.使⽤内置变量将IP地址保存到⽂本⾥,并将⽂本内容显示 出来
案例1:引用单个注册变量
- hosts: all
  tasks:
  - name: echo IP
    shell: "echo {{ ansible_default_ipv4.address }} >> /tmp/ip.txt"
  - name: cat IP
    shell: "cat /tmp/ip.txt"
    register: ip_txt
  - debug:
      msg: "{{ ip_txt.stdout_lines }}"
案例2:引用多个注册变量
[root@m-61 /script/playbook]# cat register.yml
- hosts: nfs
  tasks:
  - name: 01get IP
    shell: "echo {{ ansible_default_ipv4.address }} > /tmp/ip.txt"
  - name: 02get hostname
    shell: "echo {{ ansible_hostname }} > /tmp/hostname.txt"
  - name: 03get hostname
    shell: "cat /tmp/hostname.txt"
    register: hostname
  - name: 04cat
    shell: "showmount -e 172.16.1.31"
    register: showmount
  - debug:
      msg: "{{ item }}"
    loop:
      - "{{ showmount.stdout_lines }}"
      - "{{ hostname.stdout_lines }}"
3.如果配置⽂件发⽣了变化,就重启服务,否则不重启
- hosts: backup
  tasks:
  - name: 01-copy_conf
    copy:
      src: /opt/rsyncd.conf
      dest: /etc/
      register: conf_status
  - name: 02-start
    systemd:
      name: rsyncd
      state: started
      enabled: yes
  - name: 03-restart
    systemd:
      name: rsyncd
      state: restarted
    when: conf_status.changed
4.注册变量和判断场景
使用场景:
场景:
判断所有机器/tmp/下有没有ip.txt的文件
如果有,打印出来内容并且格式为:
例如:
web01 has ip.txt
内容为:
如果不存在:
输出内容:nfs is nofile
5.解决方案
- hosts: all
  vars:
    path1: /tmp/ip
  tasks:
  - name: test1
    shell: 'cat {{ path1 }}'
    register: retval
    ignore_errors: true
  - name: test2
    debug:
      msg: '{{ansible_hostname}} has {{path1}} , content is: {{retval.stdout}}'
    when: retval is success
  - name: test3
    debug:
      msg: '{{path1}} is nofile'
    when: retval is failed
⼋、剧本⾼级特性-服务状态管理
0.官⽅⽂档
https://docs.ansible.com/ansible/latest/user_guide/playbooks_handlers.html
1.应⽤场景
⽬前的情况:
配置⽂件发⽣变化也不会重启
理想中的情况:
如果配置⽂件不发⽣变化,就不执⾏重启
如果配置⽂件发⽣变化,就执⾏重启
2.命令实现
- hosts: backup
  tasks:
  - name: 01-copy_conf
    copy:
    src: /script/rsync/rsyncd.conf
    dest: /etc/
  notify:
    - restart rsyncd

  - name: 02-start
    systemd:
      name: rsyncd
      state: started
      enabled: yes

  handlers:
    - name: restart rsyncd
      systemd:
        name: rsyncd
        state: restarted
3.错误总结
1.handlers位置要放在最后
2.handlers⾥任务定义的名字是什么,notify⾥就写什么,不能不⼀样
九、剧本⾼级特性-选择标签
1,应⽤场景
调试,选择性的执行任务
2.添加标签
- hosts: nfs
  tasks:
  - name: 01-add group
    group: name=www gid=666
    tags: 01-add-group

  - name: 02-add user
    user: name=www create_home=no shell=/sbin/nologin group=www uid=666
    tags: 02-add-user

  - name: 03-install nfs service
    yum: name=nfs-utils state=latest
    tags: 03-install nfs service

  - name: 04-copy nfs exports
    copy: src=/service/scripts/exports dest=/etc/
    tags: 04-copy-nfs-exports

  - name: 05-create data dir
    file: path=/data state=directory owner=www group=www
    tags: 05-create-data-dir

  - name: 06-create passwd conf
    copy: content='123' dest=/etc/rsync.passwd mode=600
    tags: 06-create-passwd

  - name: 07-start rpcbind
    service: name=rpcbind state=started
    tags: 07-start-rpcbind

  - name: 08-start nfs
    service: name=nfs state=started
    tags: 08-start-nfs

  - name: 09-enable rpcbind
    systemd: name=rpcbind enabled=yes
    tags: 09-enable-rpcbind

  - name: 10-enable nfs
    systemd: name=nfs enabled=yes
    tags: 10-enable-nfs
3.打印出playbook里要执行的所有标签
ansible-playbook --list-tags rsync_install.yaml
4.指定运行某个标签
ansible-playbook -t '03-install nfs service' rsync_install_tag.yaml
5.指定不运行某个标签
ansible-playbook -t 01-add-group,02-add-user,05-create-data-dir
rsync_install_tag.yaml
6.指定不运行多个标签
ansible-playbook --skip-tags 01-add-group rsync_install_tag.yaml
7.指定不运行多个标签
ansible-playbook --skip-tags 01-add-group,02-add-user,04-copy-nfs-exports
rsync_install_tag.yaml
⼗、剧本高级特性-选择tasks
1.应用场景
调试的时候
从某个任务开始往下依次执行
2.查看task列表
ansible-playbook --list-tasks rsync_install_tag.yaml
3.选择从哪⼀个task开始执行
ansible-playbook --start-at-task '05-create data dir' rsync_install_tag.yaml
第⼗⼀章 运行检查规范
1.检查剧本拼写规范
ansible-playbook --syntax-check rsync_install.yaml
2.检查这个任务执行的主机对象
ansible-playbook --list-hosts rsync_install.yml
3.检查这个剧本需要执行哪些任务
ansible-playbook --list-tasks rsync_install.yml
4.模拟执行剧本
ansible-playbook -C rsync_install.yml
5.真正执行
ansible-playbook rsync_install.yml
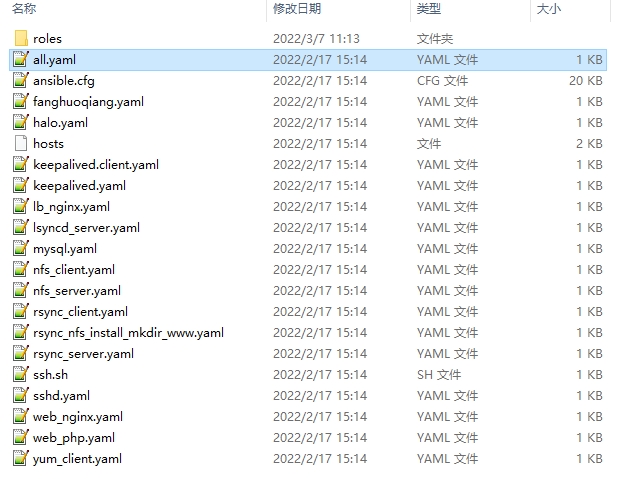
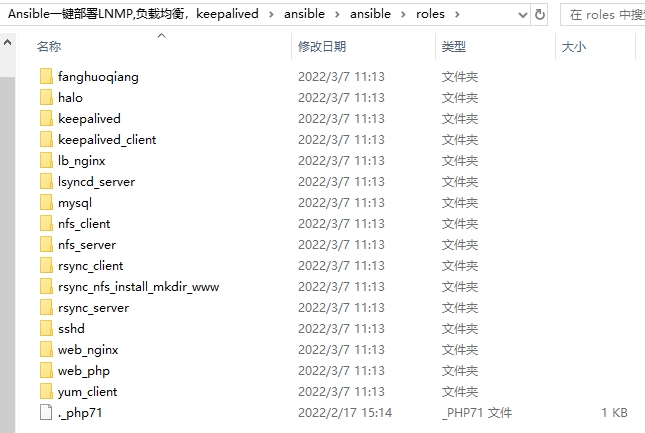
十二、一键部署LNMP架构,Linux Nginx MySQL PHP
目录结构